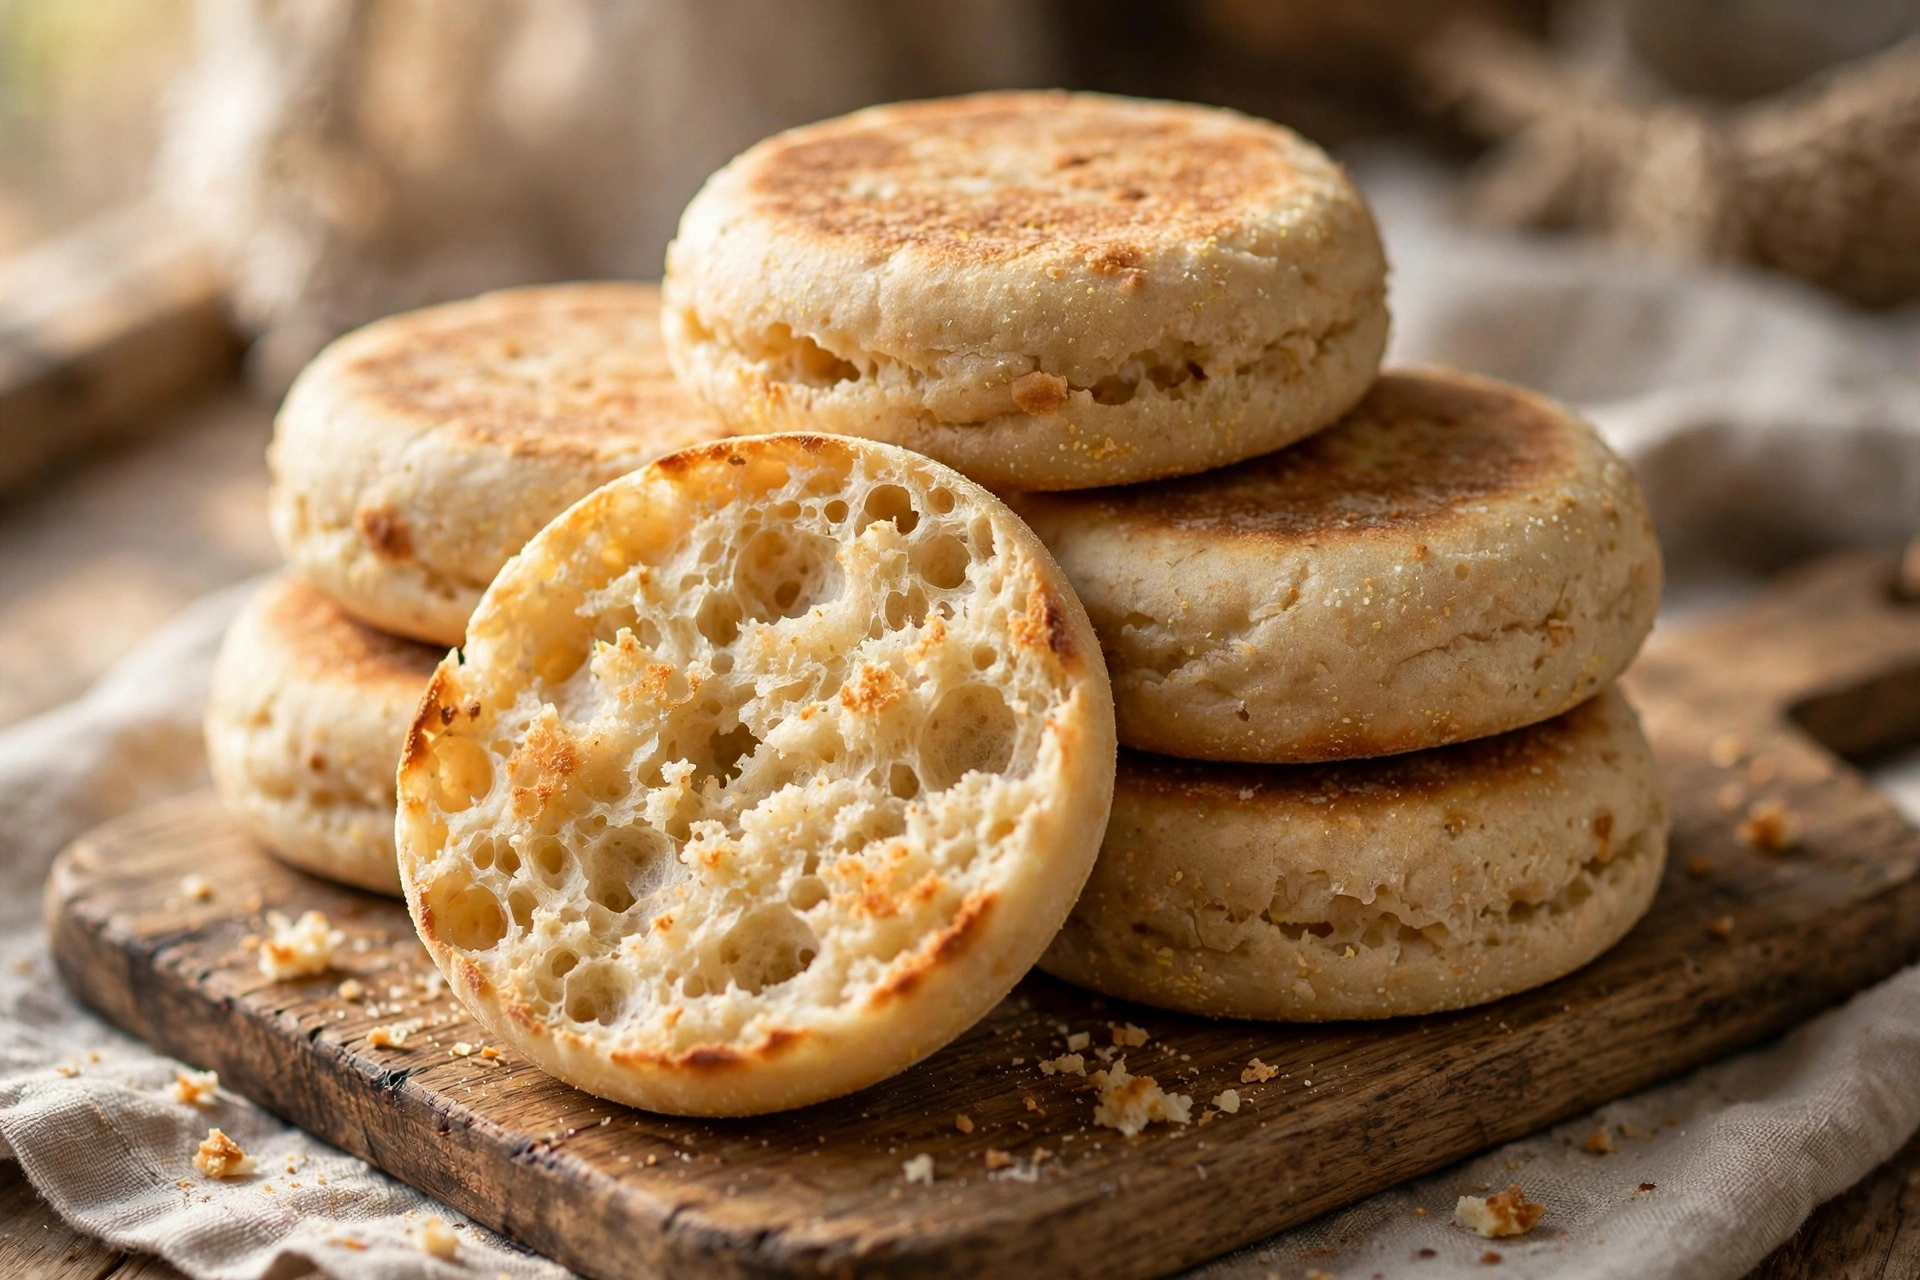
There is a particular kind of heartbreak known only to people who have gone gluten-free: the English muffin heartbreak. You remember them so clearly — those craggy, cratered rounds, split open with a fork to reveal a landscape of nooks and crannies, toasted until the ridges turn golden and crisp while the valleys stay soft and chewy, ready to catch melting butter in every pocket. Then you look at the gluten-free options in the store, and… well. Let us just say most of them taste like sweet, dense hockey pucks with none of the magic.
These homemade gluten free English muffins are here to end that heartbreak. After more batches than I care to admit — some gummy, some crumbly, one memorable batch that could have been used as doorstops — I finally landed on a recipe that delivers the real thing: a soft, slightly chewy crumb, an open texture with genuine nooks and crannies, and that distinctive tangy flavor that comes from a proper rise. They are griddled, not baked, just like the classic, which gives them those beautifully browned tops and bottoms. Split one open while it is still warm, watch the butter disappear into the crevices, and try to tell me you miss the wheat version. You will not.
What makes this recipe work when so many gluten-free breads fail is a combination of the right flour blend, a touch of psyllium husk for structure and chew, and — critically — a wetter dough than you would expect. Gluten-free doughs cannot be kneaded like wheat doughs, so instead of developing gluten for structure, we rely on hydration, a good rise, and the griddle to set everything in place. The result is an English muffin that forks apart exactly the way it should. Whether you are celiac, gluten-sensitive, or just curious, this recipe belongs in your breakfast rotation.
Why You’ll Love This Recipe
- Real nooks and crannies: Fork-split these muffins and you will find the craggy interior that makes English muffins famous — perfect for catching butter and jam.
- Soft, not dense: A high-hydration dough and psyllium husk give you chew and tenderness instead of the brick-like texture of many GF breads.
- Griddled like the original: Cooked on a skillet or griddle for those signature golden-brown tops and bottoms.
- Freezer-friendly: Make a full batch on the weekend and enjoy fresh-tasting muffins all month.
- Better than store-bought: No preservatives, no weird aftertaste — just clean, toasty, satisfying flavor.
Ingredients
- 3 cups (360 g) gluten-free all-purpose flour blend with xanthan gum — Use a trusted blend (one that already contains xanthan gum). If yours does not, add 1 1/2 teaspoons of xanthan gum.
- 2 tablespoons psyllium husk powder — This is the secret weapon: it mimics gluten’s structure, giving the muffins chew and helping them hold together. Do not skip it.
- 2 tablespoons granulated sugar — Feeds the yeast and adds a whisper of sweetness.
- 2 1/4 teaspoons (1 packet) instant yeast — Instant yeast can be mixed straight into the dry ingredients; no proofing needed.
- 1 teaspoon fine salt — Essential for flavor; GF breads taste flat without it.
- 1 1/4 cups (300 ml) warm milk (about 110°F / 43°C) — Dairy or unsweetened almond/oat milk both work. Warm, not hot — hot liquid kills yeast.
- 2 tablespoons unsalted butter, melted, plus more for the griddle — Adds richness and tenderness. Use dairy-free butter if needed.
- 1 large egg, at room temperature — Binds the dough and adds structure.
- 1/4 cup (30 g) cornmeal or extra GF flour, for dusting — The classic English muffin coating that keeps them from sticking and adds a lovely crunch.
How to Make Gluten Free English Muffins
-
Mix the dry ingredients. In a large bowl, whisk together the gluten-free flour blend, psyllium husk powder, sugar, instant yeast, and salt until thoroughly combined. The psyllium needs to be evenly distributed — any clumps will create gummy spots.
-
Add the wet ingredients. Pour in the warm milk, melted butter, and egg. Stir with a sturdy wooden spoon or spatula until a soft, sticky dough forms. It will look wetter and looser than wheat dough — that is correct and necessary. Gluten-free English muffin dough should be more like a very thick batter than a kneadable dough.
-
Rest the dough. Cover the bowl with a clean kitchen towel or plastic wrap and let it rest for 10 minutes. This gives the psyllium and flours time to fully hydrate, which dramatically improves the final texture. The dough will firm up slightly but remain soft and sticky.
-
Shape the muffins. Dust your work surface and hands generously with GF flour. Divide the dough into 8 equal portions (a kitchen scale helps — about 95 g each). With floured hands, gently shape each portion into a smooth round about 3 inches across and 3/4 inch thick. Do not overwork them; just tuck the edges under to form a neat disk.
-
Coat with cornmeal. Sprinkle cornmeal on a baking sheet. Place each shaped muffin on the sheet and dust the tops with more cornmeal. This classic coating prevents sticking and gives that authentic look and texture.
-
Let them rise. Cover the muffins loosely with a towel and let them rise in a warm, draft-free spot for 45 to 60 minutes, until visibly puffy and about 50% larger. They will not double like wheat dough — puffy is the goal. While they rise, preheat your griddle or largest skillet over low heat.
-
Griddle low and slow. Lightly butter the griddle. Using a thin spatula, carefully transfer 3 to 4 muffins onto the griddle (do not crowd them). Cook on low heat for 7 to 9 minutes per side, until deep golden brown. Low heat is critical — high heat burns the outside while leaving the inside raw. If they are browning too fast, lower the heat further and be patient.
-
Check for doneness. The muffins are done when both sides are golden and they sound hollow when tapped on the bottom. If you are unsure, you can finish them in a 350°F (175°C) oven for 5 minutes — this guarantees the centers are fully cooked without over-browning the crust.
-
Cool and split. Transfer to a wire rack and cool for at least 15 minutes. Then — and this is important — split them with a fork, not a knife. Stab the fork around the circumference and gently pull apart to reveal those beautiful nooks and crannies. Toast and serve.
Pro Tips
- Low heat is everything. The number one mistake with griddled English muffins is cooking them too hot and too fast. Low, patient heat gives you a golden crust and a fully cooked, open interior. If your first muffin is dark outside and doughy inside, turn the heat down and give the rest more time.
- Do not skip the psyllium husk. It is what gives these muffins their chew and prevents them from crumbling when split. Make sure you buy psyllium husk powder (finely ground), not whole husks, for the smoothest texture.
- Weigh your flour. Gluten-free baking is unforgiving about measurements. A kitchen scale and 360 g of flour blend will give you far more consistent results than cups.
- Fork-split, never slice. A knife compresses the crumb and destroys the nooks and crannies you worked to create. The fork-split method is non-negotiable for authentic texture.
- Test one first. Griddle a single test muffin before committing the whole batch. It lets you dial in the heat and timing for your specific stove and pan.
Variations
- Cinnamon raisin: Fold 1 teaspoon of cinnamon into the dry ingredients and 1/2 cup of raisins into the dough for a classic breakfast-shop flavor.
- Whole grain: Replace 1 cup of the GF flour blend with sorghum flour or GF oat flour for a heartier, nuttier muffin. You may need an extra tablespoon or two of milk.
- Dairy-free: Use unsweetened oat milk and dairy-free butter — the recipe works beautifully without any dairy.
- Everything bagel style: Brush the tops lightly with water before griddling and sprinkle with everything bagel seasoning for a savory twist.
- Mini muffins: Shape 12 smaller muffins instead of 8 for perfect little breakfast-sandwich sliders. Reduce griddle time by a minute or two per side.
Storage & Make-Ahead
Store cooled muffins in an airtight container or zip-top bag at room temperature for up to 2 days. For longer storage, the freezer is your friend: fork-split the muffins first (so they are ready to toast straight from frozen), then freeze in a single layer on a baking sheet before transferring to a freezer bag. They keep perfectly for up to 3 months.
To serve from frozen, pop a split muffin directly into the toaster — no thawing needed. Refrigeration is not recommended, as it makes gluten-free breads go stale faster. If your muffins start to feel firm after a day or two, a quick toast completely revives them.
FAQs
Why are my muffins dense with no nooks and crannies? Two likely culprits: the dough was too dry, or they were under-proofed. This dough should be genuinely sticky and wet — resist the urge to add extra flour when shaping. And make sure the muffins look visibly puffy before they hit the griddle.
Can I bake these instead of griddling? You can bake them at 375°F (190°C) for about 18 minutes, but you will lose the signature griddled crust and they will taste more like dinner rolls than English muffins. The griddle really is worth it.
My dough is extremely sticky — did I do something wrong? No — sticky is correct. Gluten-free English muffin dough is much wetter than wheat dough because the flours need extra hydration to stay tender. Generously floured hands and a light touch are all you need.
Are these safe for someone with celiac disease? The recipe itself is gluten-free, but safety depends on your ingredients and kitchen. Use a certified gluten-free flour blend, check that your yeast, cornmeal, and psyllium are certified GF, and prepare them with clean utensils and surfaces if your kitchen also handles wheat.
There is nothing quite like the smell of English muffins griddling on a Saturday morning — and now that joy is back on the menu, gluten or no gluten. Split one open, let the butter melt into every nook and cranny, and enjoy the breakfast you thought you had lost for good.